jtimberman's Code Blog

Chef, Ops, Ruby, Linux/Unix. Opinions are mine, not my employer's (CHEF).

Quick Tip: Testing Conditionals in ChefSpec

This tip is brought to you by the homebrew cookbook.

ChefSpec is a great way to create tests for Chef recipes to catch regressions. Sometimes recipes end up having branching conditional logic that can have very different outcomes based on external factors – attributes, existing system state, or cross-platform support.

The homebrew cookbook only supports OS X, so we don’t have cross-platform support to test there. However, its default recipe has four conditionals to test. You can read the entire default_spec.rb for full context, I’m going to focus on just one aspect here:

  • Installing homebrew should only happen if the brew binary does not exist.

This is a common use case in Chef recipes. The best way to go about converging your node to the desired state involves running some arbitrary command. In this case, it’s the installation of Homebrew itself. Normally for installations we want to use an idempotent, convergent resource like package. However, since homebrew is to be our package management system, we have to do something else. As it turns out the homebrew project provides an installation script and that script will install a binary, /usr/local/bin/brew. We will assume that if Chef converged on a node after running the script, and the brew binary exists, then we don’t need to attempt reinstallation. There’s more robust ways to go about it (e.g., running brew gives some desired output), but this works for example purposes today.

From the recipe, here’s the resource:

1
2
3
4
5
execute 'install homebrew' do
  command homebrew_go
  user node['homebrew']['owner'] || homebrew_owner
  not_if { ::File.exist? '/usr/local/bin/brew' }
end

command is a script, called homebrew_go, which is a local variable set to a path in Chef::Config[:file_cache_path]. It is retrieved in the recipe with remote_file. The resource used to have execute homebrew_go, but when ChefSpec runs, it does so in a random temporary directory, which we cannot predict the name.

The astute observer will note that the user parameter has another conditional (designated by the ||). That’s actually the subject of another post. In this post, I’m concerned only with testing the guard, not_if.

The not_if is a Ruby block, which means the Ruby code is evaluated inline during the Chef run. How we go about testing that is the subject of this post.

First, we need to mock the return result of sending the #exist? method to the File class. There are two reasons. First, we want to control the conditional so we can write a test for each outcome. Second, someone running the test (like me) might have already installed homebrew on their local system (which I have), and so /usr/local/bin/brew will exist. To do this, in our context, we have a before block that stubs the return to false:

1
2
3
4
5
6
before(:each) do
  allow_any_instance_of(Chef::Resource).to receive(:homebrew_owner).and_return('vagrant')
  allow_any_instance_of(Chef::Recipe).to receive(:homebrew_owner).and_return('vagrant')
  allow(File).to receive(:exist?).and_return(false)
  stub_command('which git').and_return(true)
end

There’s some other mocked values here. I’ll talk about the vagrant user for homebrew_owner in a moment, though again, that’s the subject of another post.

The actual spec will test that the installation script will actually get executed when we run chef, and as the vagrant user.

1
2
3
4
5
it 'runs homebrew installation as the default user' do
  expect(chef_run).to run_execute('install homebrew').with(
    :user => 'vagrant'
  )
end

When rspec runs, we see this is the case:

1
2
3
homebrew::default
  default user
    runs homebrew installation as the default user

If I didn’t mock the user, it would be jtimberman, as that is the user that is running Chef via rspec/ChefSpec. The test would fail. If you’re looking at the full file, there’s some other details we’re going to look at shortly. If I didn’t mock the return for File.exist?, the execute wouldn’t run at all.

To test what happens when /usr/local/bin/brew exists, I set up a new context in rspec, and create a new before block.

1
2
3
4
5
6
7
8
9
10
context '/usr/local/bin/brew exists' do
  before(:each) do
    allow(File).to receive(:exist?).and_return(true)
    stub_command('which git').and_return(true)
  end

  it 'does not run homebrew installation' do
    expect(chef_run).to_not run_execute('install homebrew')
  end
end

We don’t need the vagrant mocks earlier, but we do need to stub File.exist?. This test would pass on my system without it, but not on, e.g., a Linux system that doesn’t have homebrew.

Then running rspec, we see:

1
2
3
4
5
homebrew::default
  /usr/local/bin/brew exists
    does not run homebrew installation
  default user
    runs homebrew installation as the default user

In a coming post, I will walk through the conditionals related to the homebrew_owner.

Quick Tip: Serverspec Spec_helper in Test Kitchen

Recently, I’ve started refactoring some old cookbooks I wrote ages ago. I’m adding Serverspec coverage that can be run with kitchen verify. In this quicktip, I’ll describe how to create a spec_helper that can be used in all the specs. This is a convention used by many in the Ruby community to add configuration for RSpec.

For Chef, we can run integration tests after convergence using Test Kitchen using Serverspec. To do that, we need to require Serverspec, and then set its backend. In some cookbooks, the author/developer may have written spec_helper files in the various test/integration/SUITE/serverspec/ directories, but this will use a single shared file for them all. Let’s get started.

In the .kitchen.yml, add the data_path configuration directive in the provisioner.

1
2
3
provisioner:
  name: chef_zero
  data_path: test/shared

Then, create the test/shared directory in the cookbook, and create the spec_helper.rb in it.

1
2
mkdir test/shared
$EDITOR test/shared/spec_helper.rb

Minimally, it should look like this:

1
2
3
require 'serverspec'

set :backend, :exec

Then in your specs, for example test/integration/default/serverspec/default_spec.rb, require the spec_helper. On the instances under test, the file will be copied to /tmp/kitchen/data/spec_helper.rb.

1
require_relative '../../../kitchen/data/spec_helper'

That’s it, now when running kitchen test, or kitchen verify on a converged instance, the helper will be used.

Quick Tip: Chef 12 Homebrew User Mixin

OS X is an interesting operating system. It is a Unix, but is primarily used for workstations. As such, many system settings can, and should, be done as a non-privileged user. Some tasks, however, require administrative privileges. OS X uses sudo to escalate privileges. This is done by a nice GUI pop-up requesting the user password when done through another GUI element. However, one must use sudo $COMMAND when working at the Terminal.

The Homebrew package manager tries to do everything as a non-privileged user. The installation script will invoke some commands with sudo – namely to create and set the correct permissions on /usr/local (its default installation location). Once that is complete, brew install will not require privileged access for installing packages. In fact, the Homebrew project recommends never using sudo with the brew commands.

In Chef 12 the default provider for the package resource is homebrew. This originally came from the homebrew cookbook. In order to not use sudo when managing packages, there’s a helper method (mixin) that attempts to determine what non-privileged user should run the brew install command. This is also ported to Chef 12. The method can also take an argument that specifies a particular user that should run the brew command.

When managing an OS X system with Chef, it is often easier to just run chef-client as root, rather than be around when sudo prompts for a password. This means that we need a way to execute other commands for managing OS X as a non-privileged user. We can reuse the mixin to do this. I’ll demonstrate this using plain old Ruby with pry, which is installed in ChefDK, and I’ll start it up with sudo. Then, I’ll show a short recipe with chef-apply.

1
2
3
% which pry
/opt/chefdk/embedded/bin/pry
% sudo pry

Paste in the following Ruby code:

1
2
3
4
5
require 'chef'
include Chef::Mixin::HomebrewUser
include Chef::Mixin::ShellOut

find_homebrew_uid #=> 501

The method find_homebrew_uid is the helper we want. As we can see, rather than returning 0 (for root), it returns 501, which is the UID of the jtimberman user on my system. To prove that I’m executing in a process owned by root:

1
Process.uid #=> 0

Or, I can shell out to the whoami command using Chef’s shell_out method – which is the same method Chef would use to run brew install.

1
shell_out('whoami').stdout #=> "root\n"

The shell_out method can take a :user attribute:

1
shell_out('whoami', :user => find_homebrew_uid).stdout #=> "jtimberman\n"

So this can be used to install packages with brew, and is exactly what Chef 12 does.

1
shell_out('brew install coreutils', :user => find_homebrew_uid)

Or, it can be used to run defaults(1) settings that require running as a specific user, rather than root

1
2
3
# Turn off iPhoto face detection, please
shell_out('defaults write com.apple.iPhoto PKFaceDetectionEnabled 0',
          :user => find_homebrew_uid)
1
2
3
4
5
6
# before...
jtimberman@localhost% defaults read com.apple.iPhoto PKFaceDetectionEnabled
1
# after!
jtimberman@localhost% defaults read com.apple.iPhoto PKFaceDetectionEnabled
0

Putting this together in a Chef recipe that gets run by root, we can disable face detection in iPhoto like this:

1
2
3
4
5
Chef::Resource::Execute.send(:include, Chef::Mixin::HomebrewUser)

execute 'defaults write com.apple.iPhoto PKFaceDetectionEnabled 0' do
  user find_homebrew_uid
end

The first line makes the method available on all execute resources. To make the method available to all resources, use Chef::Resource.send, and to make it available across everything in all recipes, use Chef::Recipe.send. Otherwise we would get a NoMethodError exception.

The execute resource takes a user attribute, so we use the find_homebrew_uid method here to set the user. And we can observe the same results as above:

1
2
3
4
5
6
7
8
9
jtimberman@localhost% defaults write com.apple.iPhoto PKFaceDetectionEnabled 1
jtimberman@localhost% defaults read com.apple.iPhoto PKFaceDetectionEnabled
1
jtimberman@localhost% sudo chef-apply nofaces.rb
Recipe: (chef-apply cookbook)::(chef-apply recipe)
* execute[defaults write com.apple.iPhoto PKFaceDetectionEnabled 0] action run
- execute defaults write com.apple.iPhoto PKFaceDetectionEnabled 0
jtimberman@localhost% defaults read com.apple.iPhoto PKFaceDetectionEnabled
0

Those who have read the workstation management posts on this blog in the past may be aware that I have a cookbook that can manage OS X “defaults(1)” settings. I plan to make updates to the resource in that cookbook that will leverage this method.

Quick Tip: Deleting Attributes

I have a new goal for 2015, and that is to write at least one “Quick Tip” per week about Chef. I’ve added the category “quicktips” to make these easier to find.

In this quick tip, I want to talk about a new feature of Chef 12. The new feature is the ability to remove an attribute from all levels (default, normal, override) on a node so it doesn’t get saved back to the Chef Server. This was brought up in Chef RFC 23. The reason I don’t want to save the attribute in question back to the server is that it is a secret that I have in a Chef Vault item.

I’m using Datadog for my home systems, and the wonderful folks at Datadog have a cookbook to set it up. The documentation requires that you set two attributes to authenticate, the API key, and the application key:

1
2
node.default['datadog']['api_key'] = 'Secrets In Plain Text Attributes??'
node.default['datadog']['application_key'] = 'It is probably fine.'

I prefer to use chef-vault because I think it’s the best way to manage shared secrets in Chef recipes. I still need to set the attributes for Datadog’s recipe to work, however. In order to accomplish the goal here, I will use a custom cookbook, housepub-datadog. It has one recipe that looks like this:

1
2
3
4
5
6
7
8
9
10
11
12
13
14
include_recipe 'chef-vault'

node.default['datadog']['api_key'] = chef_vault_item(:secrets, 'datadog')['data']['api_key']
node.default['datadog']['application_key'] = chef_vault_item(:secrets, 'datadog')['data']['chef']

include_recipe 'datadog::dd-agent'

ruby_block 'smash-datadog-auth-attributes' do
  block do
    node.rm('datadog', 'api_key')
    node.rm('datadog', 'application_key')
  end
  subscribes :create, 'template[/etc/dd-agent/datadog.conf]', :immediately
end

Let’s take a closer look at the recipe.

1
include_recipe 'chef-vault'

Here, the chef-vault recipe is included to ensure everything works, and I have a dependency on chef-vault in my cookbook’s metadata. Next, we see the attributes set:

1
2
node.default['datadog']['api_key'] = chef_vault_item(:secrets, 'datadog')['data']['api_key']
node.default['datadog']['application_key'] = chef_vault_item(:secrets, 'datadog')['data']['chef']

The secrets/datadog item looks like this in plaintext:

1
2
3
4
5
6
7
{
  "id": "datadog",
  "data": {
    "api_key": "My datadog API key",
    "chef": "Application key for the 'chef' application"
  }
}

When Chef runs, it will load the vault-encrypted data bag item, and populate the attributes that will be used in the template. This template comes from the datadog::dd-agent recipe, which is included next. The template from that recipe looks like this:

1
2
3
4
5
6
7
8
9
template '/etc/dd-agent/datadog.conf' do
  owner 'root'
  group 'root'
  mode 0644
  variables(
    :api_key => node['datadog']['api_key'],
    :dd_url => node['datadog']['url']
  )
end

Now, for the grand finale of this post, I delete the attributes that were set using a ruby_block resource. The timing here is important, because these attributes must be deleted after Chef has converged the template. This does get updated every run, because the ruby block is not convergent, and this is okay because the attributes are updated every run, too. I could write additional logic to make this convergent, but I’m okay with the behavior. The subscribes ensures that as soon as the template is written, the node object is updated to remove the attributes. Otherwise, this happens next after the dd-agent recipe.

1
2
3
4
5
6
7
ruby_block 'smash-datadog-auth-attributes' do
  block do
    node.rm('datadog', 'api_key')
    node.rm('datadog', 'application_key')
  end
  subscribes :create, 'template[/etc/dd-agent/datadog.conf]', :immediately
end

Let’s see this in action:

1
2
3
4
5
6
7
8
9
10
managed-node$ chef-client
...
Recipe: housepub-datadog::default
  * ruby_block[smash-datadog-auth-attributes] action run
    - execute the ruby block smash-datadog-auth-attributes
...
workstation% knife node show managed-node -a datadog.api_key -a datadog.application_key
managed-node:
  datadog.api_key:
  datadog.application_key:

Bonus quick tip! knife node show can take the -a option multiple times to display more attributes. I just discovered this in writing this post, and I don’t know when it was added. For sure in Chef 12.0.3, so you should just upgrade anyway ;).

Update This feature was added by Awesome Chef Ranjib Dey.

Chef 12: Fix Untrusted Self Sign Certs

Scenario: You’ve started up a brand new Chef Server using version 12, and you have installed Chef 12 on your local system. You log into the Management Console to create a user and organization (or do this with the command-line chef-server-ctl commands), and you’re ready to rock with this knife.rb:

1
2
3
4
5
node_name                'jtimberman'
client_key               'jtimberman.pem'
validation_client_name   'tester-validator'
validation_key           'tester-validator.pem'
chef_server_url          'https://chef-server.example.com/organizations/tester'

However, when you try to check things out with knife:

1
2
3
% knife client list
ERROR: SSL Validation failure connecting to host: chef-server.example.com - SSL_connect returned=1 errno=0 state=SSLv3 read server certificate B: certificate verify failed
ERROR: OpenSSL::SSL::SSLError: SSL_connect returned=1 errno=0 state=SSLv3 read server certificate B: certificate verify failed

This is because Chef client 12 has SSL verification enabled by default for all requests. Since the certificate generated by the Chef Server 12 installation is self-signed, there isn’t a signing CA that can be verified, and this fails. Never fear intrepid user, for you can get the SSL certificate from the server and store it as a “trusted” certificate. To find out how, use knife ssl check.

1
2
3
4
5
6
7
8
9
10
11
12
13
14
15
16
17
18
19
20
21
22
23
24
25
26
27
28
Connecting to host chef-server.example.com:443
ERROR: The SSL certificate of chef-server.example.com could not be verified
Certificate issuer data: /C=US/ST=WA/L=Seattle/O=YouCorp/OU=Operations/CN=chef-server.example.com/emailAddress=you@example.com

Configuration Info:

OpenSSL Configuration:
* Version: OpenSSL 1.0.1j 15 Oct 2014
* Certificate file: /opt/chefdk/embedded/ssl/cert.pem
* Certificate directory: /opt/chefdk/embedded/ssl/certs
Chef SSL Configuration:
* ssl_ca_path: nil
* ssl_ca_file: nil
* trusted_certs_dir: "/Users/jtimberman/Downloads/chef-repo/.chef/trusted_certs"

TO FIX THIS ERROR:

If the server you are connecting to uses a self-signed certificate, you must
configure chef to trust that server's certificate.

By default, the certificate is stored in the following location on the host
where your chef-server runs:

  /var/opt/chef-server/nginx/ca/SERVER_HOSTNAME.crt

Copy that file to your trusted_certs_dir (currently: /Users/jtimberman/Downloads/chef-repo/.chef/trusted_certs)
using SSH/SCP or some other secure method, then re-run this command to confirm
that the server's certificate is now trusted.

(note, this chef-server location is incorrect, it’s /var/opt/opscode)

There is a fetch plugin for knife too. Let’s download the certificate to the automatically preconfigured trusted certificate location mentioned in the output above.

1
2
3
4
5
6
7
8
% knife ssl fetch
WARNING: Certificates from chef-server.example.com will be fetched and placed in your trusted_cert
directory (/Users/jtimberman/Downloads/chef-repo/.chef/trusted_certs).

Knife has no means to verify these are the correct certificates. You should
verify the authenticity of these certificates after downloading.

Adding certificate for chef-server.example.com in /Users/jtimberman/Downloads/chef-repo/.chef/trusted_certs/chef-server.example.com.crt

The certificate should be verified that what was downloaded is in fact the same as the certificate on the Chef Server. For example, I compared SHA256 checksums:

1
2
3
4
% ssh ubuntu@chef-server.example.com sudo sha256sum /var/opt/opscode/nginx/ca/chef-server.example.com.crt
043728b55144861ed43a426c67addca357a5889158886aee50685cf1422b5ebf  /var/opt/opscode/nginx/ca/chef-server.example.com.crt
% gsha256sum .chef/trusted_certs/chef-server.example.com.crt
043728b55144861ed43a426c67addca357a5889158886aee50685cf1422b5ebf  .chef/trusted_certs/chef-server.example.com.crt

Now check knife client list again.

1
2
% knife client list
tester-validator

Victory!

Now, we need to get the ceritficate out to every node in the infrastructure in its trusted_certs_dir – by default this is /etc/chef/trusted_certs. The most simple way to do this is to use knife ssh to run knife on the target nodes.

1
2
3
4
5
6
7
8
% knife ssh 'name:*' 'sudo knife ssl fetch -c /etc/chef/client.rb'
node-output.example.com WARNING: Certificates from chef-server-example.com will be fetched and placed in your trusted_cert
node-output.example.com directory (/etc/chef/trusted_certs).
node-output.example.com
node-output.example.com Knife has no means to verify these are the correct certificates. You should
node-output.example.com verify the authenticity of these certificates after downloading.
node-output.example.com
node-output.example.com Adding certificate for chef-server.example.com in /etc/chef/trusted_certs/chef-server.example.com.crt

The output will be interleaved for all the nodes returned by knife ssh. Of course, we should verify the SHA256 checksums like before, which can be done again with knife ssh.

Reflecting on Six Years With Chef

It actually started a bit over seven years ago. I saw the writing on the wall at IBM; my job was soon to be outsourced. I found an open position with the SANS institute, accepted an offer there, and was due to start work in a couple of weeks. Around the same time, my friends Adam Jacob and Nathan Haneysmith had started HJK Solutions. They invited me to join them then, but it wasn’t the right time for me. Adam told me that at SANS I should at least use the automation tools and general infrastructure management model they planned to use. It turned out this was sage advice, for a number of reasons.

Around April, 2008, Adam told me he was working on “Chef,” a Ruby based configuration management and system integration framework. I was excited about its potential, and a few months later on July 2, 2008, I started with HJK Solutions as a Linux system administration consultant. I got familiar with HJK’s puppet-based stack, and ancillary Ruby tools like iClassify while working on their customer infrastructures over the coming months. After Opscode was founded and we released Chef 0.5, my primary focus was porting HJK’s puppet modules to chef cookbooks.

opscode/cookbooks

Adam had started the repository to give new users a place to begin using Chef with full working examples. I continued their development, and had the opportunity to solve hard problems of integration web application stacks with them. There were three important reasons for the repository to exist:

  1. We have a body of knowledge as a tribe, and that can be codified.
  2. Infrastructure as code is real, and it can be reusable.
  3. The best way to learn Chef is to use Chef, and I had a goal to know Chef well enough to teach it to new users and companies.

The development of general purpose cookbooks ends up being harder than any of us really imagined, I think. Every platform is different, so not only did I have to learn Chef, I had to learn how different platforms behave for common (and uncommon) pieces of software in web operations stacks. Over the years of managing these cookbooks, I learned a lot about how the community was developing workflows for using Chef, and how they differed from our opinions. I learned also learned how to manage and contribute to open source projects at a rather large scale, and how to have compassion and empathy for new or frustrated users.

Training and Services

In my time at CHEF, nee Opscode, I’ve had several job role changes. After several months of working on cookbooks, I added package and release management (RIP, apt.opscode.com) to my repertoire. I then switched to technical evangelism and training. With mentorship from John Willis, I drafted the initial version of Chef Fundamentals, and delivered our inaugural training class in Seattle.

I worked with the team John built to deliver training, speak at conferences, and work directly with customers to help make them successful with Chef. Eventually, John left the company to build an awesome team at Enstratius. I took on the role of Director of the team, but eventually I discovered that the management track was not the future of my career.

Open Source and Community

I came back to working on the cookbooks, which I had previously split into separate repositories. I was also working more directly in the community, doing public training classes only (our consulting team did private/onsite classes), participating in our IRC channels and mailing lists. We had some organization churn, and I was moved around between four different managers, eventually reporting to the inimitable Nathen Harvey.

During one of our 1-1 discussions, he said, “You know, Joshua. You write a lot of cookbooks to automate infrastructure. But you haven’t actually worked on any infrastructure in years. You should do something about that.”

Around that time, there was a “senior system administrator” job posting on our very own careers site. I talked to our VP of Operations, and after a brief transition period, moved completely over to the ops team. I was able to bring with me the great practices from the community for developing cookbooks: testing with chefspec and serverspec, code consistency with rubocop and foodcritic, and wrapping it all up with test kitchen.

The Future

I’ve had the privilege to do work that I love, which is automating hard problems using Chef. I’ve also had the privilege of being part of the web operations, infrastructure as code, devops, and Chef communities over the past six years. I’ve been to all four Chef summits, and all three ChefConfs. A thing I’ve noticed over the years is that many conversations keep coming up at the summits and ChefConf. Fresh on my mind because the last summit was so recent is the topic of cookbook reusability. See, during the time that I managed opscode/cookbooks, I eventually saw the point people in the community were making about these being real software repositories that need to be managed like other complex software projects. We split up the repository into individual repositories per cookbook. We started adding test coverage, and conforming to consistency via syntax and style lint checking. That didn’t make cookboks more reusable, but it lowered the barrier of contribution, which in turn made them more reusable as more use cases could be covered. I got to be a part of that evolution, and it’s been awesome.

While using Chef is one of my favorite technical things to do, I have come to the conclusion that based on my experience the best thing I can do is be a facilitator of stronger technical discipline with regard to using Chef. Primarily, this means improving how CHEF uses Chef to build Chef for our community and customers. We’re already really good at using Chef to build Chef (the product), and run Hosted Chef (the service). However, awesome tools from the community such as Test Kitchen, Berkshelf, ChefSpec, and Foodcritic did not exist when we started out. Between new, awesome tools, and growing our organization with new awesome people, we need to improve on getting our team members up to speed on the process and workflow that helps us deliver higher quality products.

That is why I’m moving into a new role at CHEF. The sixth year marks as good a time as any to make a change, and I’m no stranger to that. I’m joining a team of quality advocacy led by Joseph Smith, as part of Jez Humble’s “Office of Continuous Improvement and Velocity.” In this new role, I will focus on improving our overall technical excellence so we can deliver better products to our community and customers, and so we can have awesome use cases and examples for managing Chef Server and its add-ons at scale.

My first short term goal in this new role is a workstation automation cookbook that can be used and extended by our internal teams for ensuring everyone has a consistent set of tools to work on the product. This will be made an open source project that the community can use and extend as well. We’ll have more information about this as it becomes “a thing.”

Next, I want to improve how we work on incidents. We’ve had sporadic blog posts about issues in Hosted Chef and Supermarket, and I’d like to see this get better.

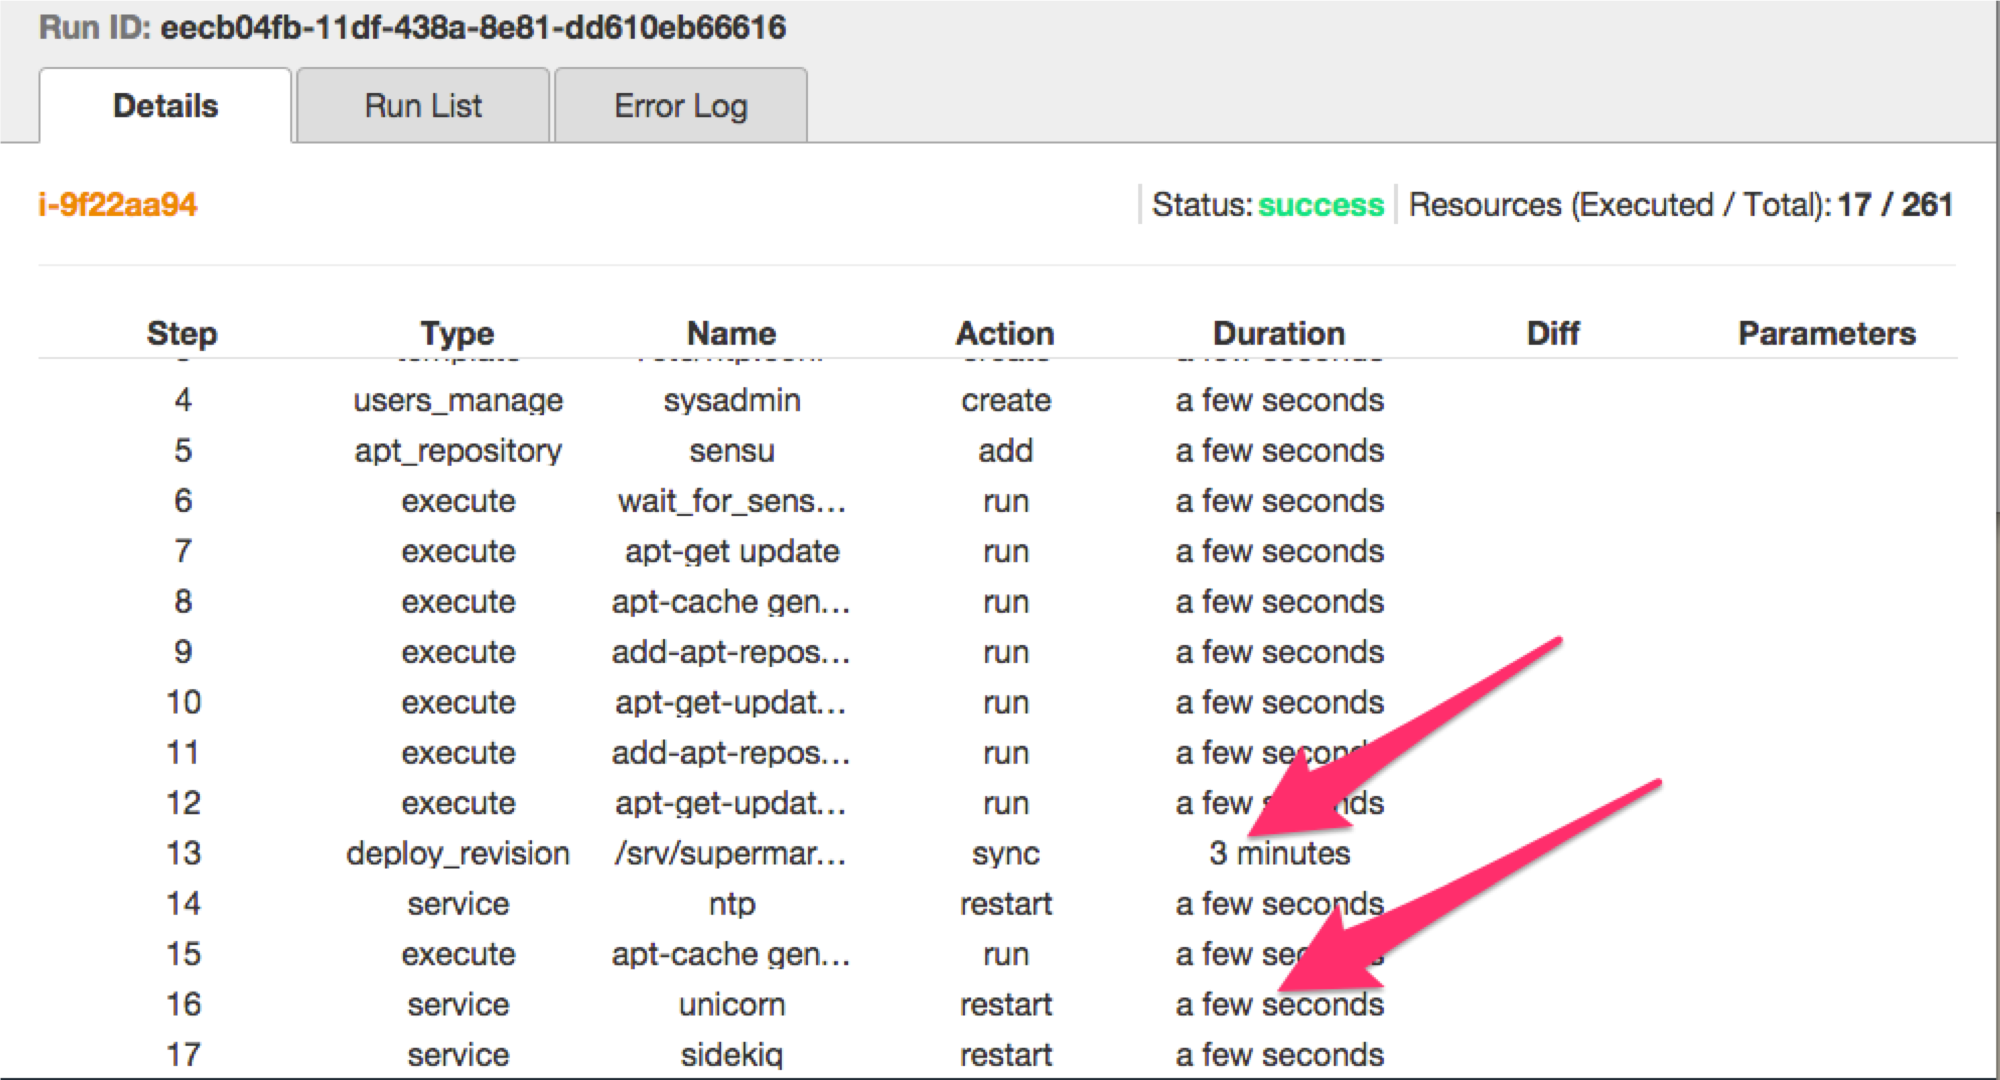
I’m also interested in managing Chef Server 12 clusters, including all the add-ons. Recently I worked on the chef-server-cluster cookbook, which will become the way CHEF deploys and manages Hosted Chef using the version 12 packages. Part of the earliest days of opscode/cookbooks, I maintained cookbooks to setup the open source Chef Server. Long time users may remember the “chef solo bootstrap” stack. Since then, CHEF has continued to iterate on that idea, and the “ctl” management commands largely use chef-solo under the hood. The new cookbook combines and wraps up manual processes and the “ctl” commands to enable us, our community, and our customers to build scalable Chef Server clusters using the omnibus packages. The cookbook uses chef-provisioning to do much of the heavy lifting.

It should be easy for organizations to be successful with Chef. That includes CHEF! My goal in my new position is to fuel the love of Chef internally and externally, whip up awesome, and stir up more delight. I also look forward to seeing what our community and customers do with Chef in their organizations.

Thank you

I’d like to thank the friends and mentors I’ve had along this journey. You’re all important, and we’ve shared some good times and code, and sometimes hugs. It’s been amazing to see so many people become successful with Chef.

Above all, I’d like to thank Adam Jacob: for the opportunity to join in this ride, for inspiration to be a better system administrator and operations professional, for mentorship along the way, and for writing Chef in the first place. Cheers, my friend.

Here’s to many more years of whipping up awesome!

Chef Reporting API and Resource Updates

Have you ever wanted to find a list of nodes that updated a specific resource in a period of time? Such as “show me all the nodes in production that had an application service restart in the last hour”? Or, “which nodes have updated their apt cache recently?” For example,

1
2
3
4
5
6
7
8
% knife report resource 'role:supermarket-app AND chef_environment:supermarket-prod' execute 'apt-get update'
execute[apt-get update] changed in the following runs:
app-supermarket1.example.com 2230cf30-6d95-4e43-be18-211137eaf802 @ 2014-10-07T14:07:03Z
app-supermarket2.example.com c5e4d7bf-95a6-4385-9d8e-c6f5617ed79b @ 2014-10-07T14:14:04Z
app-supermarket3.example.com c4c4b4bb-91b6-4f73-9876-b24b093c7f1e @ 2014-10-07T14:09:54Z
app-supermarket4.example.com 3eb09034-7539-4a3c-af6d-5b01d35bc63f @ 2014-10-07T13:31:56Z
app-supermarket5.example.com aa48c1d3-da91-4031-a43d-582a577cbf2d @ 2014-10-07T13:35:15Z
Use `knife runs show` with the run UUID to get more info

I have released a new knife plugin to do that, but first some background.

At CHEF, we run the community’s cookbook site, Supermarket. We monitor the systems that run the site with Sensu. The current infrastructure runs instances on Amazon Web Services EC2, with an Elastic Load Balancer (ELB) in front of them. As a corrective action for a Supermarket outage, CHEF’s operations team added a new check for elevated HTTP 500 responses from the application servers behind the ELB. One thing we found was that when Supermarket was deployed, and the unicorn server restarted, we would see elevated 500’s, but the site often wouldn’t actually be impacted.

The Sensu check is run from a “relay” node. That is, it isn’t run on the application servers or the Sensu server – it’s run out of band since it’s for the ELB. One might imagine we could have similar checks for other services that aren’t run on “managed nodes,” but that’s neither here nor there. The issue is that we get an alert message that looks like this:

1
Sensu Alerts  ALERT - [i-d1dfd5d9/check-elb-backend-500] - CheckELBMetrics CRITICAL: supermarket-elb; Sum of HTTPCode_Backend_5XX is 2538.0. (expected lower than 30.0); (HTTPCode_Backend_5XX '2538.0' within 300 seconds between 2014-08-19 13:33:36 +0000 to 2014-08-19 13:38:36 +0000) [Playbook].

The first part, [i-d1dfd5d9/check-elb-backend-500] is the node name and the check that alerted. The node name here is the monitoring relay that runs the check, not the actual node or nodes where Supermarket was deployed and restarted. This is where Chef Reporting comes into play. In Chef Reporting, we can view information about recent Chef client runs, which gives us a graph like this.

If we go look at the reports in the Chef Manage console, we can drill down to something like this.

This shows that unicorn was restarted in this run. That’s great, but if I’m getting this alert at a time when I’m not particularly coherent (e.g, 2AM), I want a command in a playbook that I can run to get more information quickly without having to log into the webui and click around imprecisely. CHEF publishes a knife-reporting gem that has a couple handy sub-commands to retrieve this run data. For example, we can list runs.

1
2
3
4
5
6
7
8
9
10
% knife runs list
node_name:  i-3022aa3b
run_id:     9eccd8f6-876b-4a57-87ac-0b3e7b7ef1e7
start_time: 2014-08-21T17:03:56Z
status:     started

node_name:  i-a09424a8
run_id:     f2b7871a-149b-4fd3-abdc-d74a838d719a
start_time: 2014-08-21T17:00:23Z
status:     success

Or, we can display a specific run.

1
2
3
4
5
6
7
8
9
10
11
12
13
14
15
16
17
18
19
20
21
22
23
24
25
26
% knife runs show eecb04fb-11df-438a-8e81-dd610eb66616
run_detail:
  data:
  end_time:          2014-08-20T17:50:12Z
  node_name:         i-9f22aa94
  run_id:            eecb04fb-11df-438a-8e81-dd610eb66616
  run_list:          ["role[base]","role[supermarket-app]"]
  start_time:        2014-08-20T17:45:37Z
  status:            success
  total_res_count:   261
  updated_res_count: 17
run_resources:
  cookbook_name:    supermarket
  cookbook_version: 2.7.2
  duration:         209
  final_state:
    enabled: false
    running: true
  id:               unicorn
  initial_state:
    enabled: false
    running: true
  name:             unicorn
  result:           restart
  type:             service
  uri:              https://api.opscode.com/organizations/supermarket/reports/org/runs/eecb04fb-11df-438a-8e81-dd610eb66616/15

This is handy, but a little limited. What if I want to display only the runs containing the service[unicorn] resource?

That’s where my knife-report-resource plugin helps. At first, it was very much specific to finding unicorn restarts on Supermarket app servers. However, I wanted to make it more general purpose as I think people would want to be able to find when arbitrary resources were updated. This is how it works:

  1. Query the Chef Server for a particular set of nodes. For example, 'role:supermarket-app AND chef_environment:supermarket-prod'.
  2. Get all the Chef client runs for a specified time period up until the current time. By default, it starts from one hour ago, but we can pass an ISO8601 timestamp.
  3. Iterate over all the runs looking for runs by the nodes that were returned by the search query, gathering the specified resource type and name.
  4. Display some nice output with the node’s FQDN, the run’s UUID, and a timestamp.

From the earlier example:

1
2
3
4
5
6
7
8
% knife report resource 'role:supermarket-app AND chef_environment:supermarket-prod' execute 'apt-get update'
execute[apt-get update] changed in the following runs:
app-supermarket1.example.com 2230cf30-6d95-4e43-be18-211137eaf802 @ 2014-10-07T14:07:03Z
app-supermarket2.example.com c5e4d7bf-95a6-4385-9d8e-c6f5617ed79b @ 2014-10-07T14:14:04Z
app-supermarket3.example.com c4c4b4bb-91b6-4f73-9876-b24b093c7f1e @ 2014-10-07T14:09:54Z
app-supermarket4.example.com 3eb09034-7539-4a3c-af6d-5b01d35bc63f @ 2014-10-07T13:31:56Z
app-supermarket5.example.com aa48c1d3-da91-4031-a43d-582a577cbf2d @ 2014-10-07T13:35:15Z
Use `knife runs show` with the run UUID to get more info

Then, we can drill down further into one of these runs with the knife-reporting plugin.

1
2
3
4
5
6
7
8
9
10
11
12
13
14
15
16
17
18
19
20
21
22
23
24
25
26
27
28
29
30
31
32
33
34
35
36
37
% knife runs show 2230cf30-6d95-4e43-be18-211137eaf802
run_detail:
  data:
  end_time:          2014-10-07T14:07:03Z
  node_name:         i-d7fed0df
  run_id:            2230cf30-6d95-4e43-be18-211137eaf802
  run_list:          ["role[base]","role[supermarket-app]"]
  start_time:        2014-10-07T14:03:59Z
  status:            success
  total_res_count:   271
  updated_res_count: 12
run_resources:
  cookbook_name:    chef-client
  cookbook_version: 3.6.0
  duration:         99
  final_state:
    enabled: true
    running: false
  id:               chef-client
  initial_state:
    enabled: true
    running: true
  name:             chef-client
  result:           enable
  type:             runit_service
  uri:              https://api.opscode.com/organizations/supermarket/reports/org/runs/2230cf30-6d95-4e43-be18-211137eaf802/0
...
  cookbook_name:    supermarket
  cookbook_version: 2.11.0
  duration:         8506
  final_state:
  id:               apt-get update
  initial_state:
  name:             apt-get update
  result:           run
  type:             execute
  uri:              https://api.opscode.com/organizations/supermarket/reports/org/runs/2230cf30-6d95-4e43-be18-211137eaf802/5

Hopefully you find this plugin useful! It is a RubyGem, and is available on RubyGems.org, and the source is available on GitHub.

Chef::Node.debug_value

Update: As mentioned by Dan DeLeo, he discussed this feature on Chef 11 In-Depth: Attributes Changes last year when Chef 11 was released. I somehow never got a chance to use it, and thought this post would be a helpful example.

Earlier today I was reminded by Steven Danna about a newer feature of Chef called debug_value. This is a method on the node object (Chef::Node) which will show where in Chef’s attribute hierarchy a particular attribute or sub-attribute was set on the node.

Fire up a chef shell in client mode on the node you want to see:

1
chef-shell -z

For example, I’ll use my minecraft server, using the excellent minecraft cookbook.

1
2
chef > node.run_list
 => role[minecraft-server]

The cookbook itself sets a node['minecraft'] attribute hash.

1
2
chef > node['minecraft']
 => {"user"=>"mcserver", "group"=>"mcserver", "install_dir"=>"/srv/minecraft", "install_type"=>"vanilla" ... omg a huge hash of attributes}

Of note are the server properties attributes, which I customize in the role. Here is the node['minecraft']['properties'] attributes hash on my node:

1
2
chef > node['minecraft']['properties']
 => {"allow-flight"=>false, "allow-nether"=>true, "difficulty"=>"1", "enable-query"=>false, "enable-rcon"=>false, "enable-command-block"=>false, "force-gamemode"=>true, "gamemode"=>"0", "generate-structures"=>true, "hardcore"=>false, "level-name"=>"creative-survival", "level-seed"=>"", "level-type"=>"DEFAULT", "max-build-height"=>"256", "max-players"=>"20", "motd"=>"It's the will to survive", "online-mode"=>true, "op-permission-level"=>4, "player-idle-timeout"=>0, "pvp"=>"false", "query.port"=>"25565", "rcon.password"=>"", "rcon.port"=>"25575", "server-ip"=>"", "server-name"=>"Housepub", "server-port"=>"25565", "snooper-enabled"=>"false", "spawn-animals"=>true, "spawn-monsters"=>true, "spawn-npcs"=>true, "spawn-protection"=>1, "texture-pack"=>"", "view-distance"=>10, "white-list"=>false}

And I can see where these were set using the #debug_value method. Each sub-attribute should be passed as an argument.

1
2
3
4
5
6
7
8
9
10
11
12
13
14
15
16
17
18
19
20
21
22
23
24
25
26
27
28
29
30
31
32
33
34
35
36
37
38
39
40
41
42
43
44
45
46
47
48
49
50
51
52
53
54
55
chef > pp node.debug_value('minecraft', 'properties')
[["set_unless_enabled?", false],
 ["default",
  {"allow-flight"=>false,
   "allow-nether"=>true,
   "difficulty"=>1,
   "enable-query"=>false,
   "enable-rcon"=>false,
   "enable-command-block"=>false,
   "force-gamemode"=>false,
   "gamemode"=>0,
   "generate-structures"=>true,
   "hardcore"=>false,
   "level-name"=>"world",
   "level-seed"=>"",
   "level-type"=>"DEFAULT",
   "max-build-height"=>"256",
   "max-players"=>"20",
   "motd"=>"A Minecraft Server",
   "online-mode"=>true,
   "op-permission-level"=>4,
   "player-idle-timeout"=>0,
   "pvp"=>true,
   "query.port"=>"25565",
   "rcon.password"=>"",
   "rcon.port"=>"25575",
   "server-ip"=>"",
   "server-name"=>"Unknown Server",
   "server-port"=>"25565",
   "snooper-enabled"=>true,
   "spawn-animals"=>true,
   "spawn-monsters"=>true,
   "spawn-npcs"=>true,
   "spawn-protection"=>16,
   "texture-pack"=>"",
   "view-distance"=>10,
   "white-list"=>false}],
 ["env_default", :not_present],
 ["role_default",
  {"difficulty"=>"1",
   "gamemode"=>"0",
   "force-gamemode"=>true,
   "motd"=>"It's the will to survive",
   "pvp"=>"false",
   "server-name"=>"Housepub",
   "level-name"=>"creative-survival",
   "spawn-protection"=>1,
   "snooper-enabled"=>"false"}],
 ["force_default", :not_present],
 ["normal", :not_present],
 ["override", :not_present],
 ["role_override", :not_present],
 ["env_override", :not_present],
 ["force_override", :not_present],
 ["automatic", :not_present]]

From the role, we can see some properties attributes are set:

1
2
3
4
5
6
7
8
9
10
 ["role_default",
  {"difficulty"=>"1",
   "gamemode"=>"0",
   "force-gamemode"=>true,
   "motd"=>"It's the will to survive",
   "pvp"=>"false",
   "server-name"=>"Housepub",
   "level-name"=>"creative-survival",
   "spawn-protection"=>1,
   "snooper-enabled"=>"false"}],

Note that even though these are also set by default, we get them in the output here too.

Load_current_resource and Chef-shell

This post will illustrate load_current_resource and a basic use of chef-shell.

The chef-shell is an irb-based REPL (read-eval-print-loop). Everything I do is Ruby code, just like in Chef recipes or other cookbook components. I’m going to use a package resource example, so need privileged access (sudo).

1
% sudo chef-shell

The chef-shell program loads its configuration, determines what session type, and displays a banner. In this case, we’re taking all the defaults, which means no special configuration, and a standalone session.

1
2
3
4
5
6
7
8
9
10
11
12
loading configuration: none (standalone session)
Session type: standalone
Loading...done.

This is the chef-shell.
 Chef Version: 11.14.0.rc.2
 http://www.opscode.com/chef
 http://docs.opscode.com/

run `help' for help, `exit' or ^D to quit.

Ohai2u jtimberman@jenkins.int.housepub.org!

To evaluate resources as we’d write them in a recipe, we need to switch to recipe mode.

1
chef > recipe_mode

I can do anything here that I can do in a recipe. I could paste in my own recipes. Here, I’m just going to add a package resource to manage the vim package. Note that this works like the “compile” phase of a chef-client run. The resource will be added to the Chef::ResourceCollection object. We’ll look at this in a little more detail shortly.

1
2
chef:recipe > package "vim"
 => <package[vim] @name: "vim" @noop: nil @before: nil @params: {} @provider: nil @allowed_actions: [:nothing, :install, :upgrade, :remove, :purge, :reconfig] @action: :install @updated: false @updated_by_last_action: false @supports: {} @ignore_failure: false @retries: 0 @retry_delay: 2 @source_line: "(irb#1):1:in `irb_binding'" @guard_interpreter: :default @elapsed_time: 0 @sensitive: false @candidate_version: nil @options: nil @package_name: "vim" @resource_name: :package @response_file: nil @response_file_variables: {} @source: nil @version: nil @timeout: 900 @cookbook_name: nil @recipe_name: nil>

I’m done adding resources/writing code to test, so I’ll initiate a Chef run with the run_chef method (this is a special method in chef-shell).

1
2
3
4
5
6
7
8
9
10
11
12
13
14
15
chef:recipe > run_chef
[2014-07-21T09:04:51-06:00] INFO: Processing package[vim] action install ((irb#1) line 1)
[2014-07-21T09:04:51-06:00] DEBUG: Chef::Version::Comparable does not know how to parse the platform version: jessie/sid
[2014-07-21T09:04:51-06:00] DEBUG: Chef::Version::Comparable does not know how to parse the platform version: jessie/sid
[2014-07-21T09:04:51-06:00] DEBUG: package[vim] checking package status for vim
vim:
  Installed: 2:7.4.335-1
  Candidate: 2:7.4.335-1
  Version table:
 *** 2:7.4.335-1 0
        500 http://ftp.us.debian.org/debian/ testing/main amd64 Packages
        100 /var/lib/dpkg/status
[2014-07-21T09:04:51-06:00] DEBUG: package[vim] current version is 2:7.4.335-1
[2014-07-21T09:04:51-06:00] DEBUG: package[vim] candidate version is 2:7.4.335-1
[2014-07-21T09:04:51-06:00] DEBUG: package[vim] is already installed - nothing to do

Let’s take a look at what’s happening. Note that we have INFO and DEBUG output. By default, chef-shell runs with Chef::Log#level set to :debug. In a normal Chef Client run with :info output, we see the first line, but not the others. I’ll show each line, and then explain what Chef did.

1
[2014-07-21T09:04:51-06:00] INFO: Processing package[vim] action install ((irb#1) line 1)

There is a timestamp, the resource, package[vim], the action install Chef will take, and the location in the recipe where this was encountered. I didn’t specify one in the resource, that’s the default action for package resources. The irb#1 line 1 just means that it was the first line of the irb in recipe mode.

1
2
[2014-07-21T09:04:51-06:00] DEBUG: Chef::Version::Comparable does not know how to parse the platform version: jessie/sid
[2014-07-21T09:04:51-06:00] DEBUG: Chef::Version::Comparable does not know how to parse the platform version: jessie/sid

Chef chooses the default provider for each resource based on a mapping of platforms and their versions. It uses an internal class, Chef::Version::Comparable to do this. The system I’m using is a Debian “testing” system, which has the codename jessie, but it isn’t a specific release number. Chef knows that for all debian platforms to use the apt package provider, and that’ll do here.

1
2
3
4
5
6
7
8
9
10
[2014-07-21T09:04:51-06:00] DEBUG: package[vim] checking package status for vim
vim:
  Installed: 2:7.4.335-1
  Candidate: 2:7.4.335-1
  Version table:
 *** 2:7.4.335-1 0
        500 http://ftp.us.debian.org/debian/ testing/main amd64 Packages
        100 /var/lib/dpkg/status
[2014-07-21T09:04:51-06:00] DEBUG: package[vim] current version is 2:7.4.335-1
[2014-07-21T09:04:51-06:00] DEBUG: package[vim] candidate version is 2:7.4.335-1

This output is the load_current_resource method implemented in the apt package provider.

The check_package_state method does all the heavy lifting. It runs apt-cache policy and parses the output looking for the version number. If we used the :update action, and the installed version wasn’t the same as the candidate version, Chef would install the candidate version.

Chef resources are convergent. They only get updated if they need to be. In this case, the vim package is installed already (our implicitly specified action), so we see the following line:

1
[2014-07-21T09:04:51-06:00] DEBUG: package[vim] is already installed - nothing to do

Nothing to do, Chef finishes its run.

Modifying Existing Resources

We can manipulate the state of the resources in the resource collection. This isn’t common in most recipes. It’s required for certain kinds of development patterns like “wrapper” cookbooks. As an example, I’m going to modify the resource object so I don’t have to log into the system again and run apt-get remove vim, to show the next section.

First, I’m going to create a local variable in the context of the recipe. This is just like any other variable in Ruby. For its value, I’m going to use the #resources() method to look up a resource in the resource collection.

1
2
chef:recipe > local_package_variable = resources("package[vim]")
 => <package[vim] @name: "vim" @noop: nil @before: nil @params: {} @provider: nil @allowed_actions: [:nothing, :install, :upgrade, :remove, :purge, :reconfig] @action: :install @updated: false @updated_by_last_action: false @supports: {} @ignore_failure: false @retries: 0 @retry_delay: 2 @source_line: "(irb#1):1:in `irb_binding'" @guard_interpreter: :default @elapsed_time: 0.029617095 @sensitive: false @candidate_version: nil @options: nil @package_name: "vim" @resource_name: :package @response_file: nil @response_file_variables: {} @source: nil @version: nil @timeout: 900 @cookbook_name: nil @recipe_name: nil>

The return value is the package resource object:

1
2
chef:recipe > local_package_variable.class
 => Chef::Resource::Package

(#class is a method on the Ruby Object class that returns the class of the object)

To remove the vim package, I use the #run_action method (available to all Chef::Resource subclasses), specifying the :remove action as a symbol:

1
2
3
chef:recipe > local_package_variable.run_action(:remove)
[2014-07-21T09:11:50-06:00] INFO: Processing package[vim] action remove ((irb#1) line 1)
[2014-07-21T09:11:52-06:00] INFO: package[vim] removed

There is no additional debug to display. Chef will run apt-get remove vim to converge the resource with this action.

Load Current Resource Redux

Now that the package has been removed from the system, what happens if we run Chef again? Well, Chef is convergent, and it takes idempotent actions on the system to ensure that the managed resources are in the desired state. That means it will install the vim package.

1
2
chef:recipe > run_chef
[2014-07-21T09:11:57-06:00] INFO: Processing package[vim] action install ((irb#1) line 1)

We’ll see some familiar messages here about the version, then:

1
2
3
4
5
6
7
8
9
[2014-07-21T09:11:57-06:00] DEBUG: package[vim] checking package status for vim
vim:
  Installed: (none)
  Candidate: 2:7.4.335-1
  Version table:
     2:7.4.335-1 0
        500 http://ftp.us.debian.org/debian/ testing/main amd64 Packages
[2014-07-21T09:11:57-06:00] DEBUG: package[vim] current version is nil
[2014-07-21T09:11:57-06:00] DEBUG: package[vim] candidate version is 2:7.4.335-1

This is load_current_resource working as expected. As we can see from the apt-cache policy output, the package is not installed, and as the action to take is :install, Chef will do what we think:

1
2
3
4
5
6
7
8
9
10
11
12
13
14
15
16
17
18
19
20
21
22
23
24
25
26
27
28
Reading package lists...
Building dependency tree...
Reading state information...
The following packages were automatically installed and are no longer required:
  g++-4.8 geoclue geoclue-hostip geoclue-localnet geoclue-manual
  geoclue-nominatim gstreamer0.10-plugins-ugly libass4 libblas3gf libcolord1
  libcolorhug1 libgeoclue0 libgnustep-base1.22 libgnutls28 libminiupnpc8
  libpoppler44 libqmi-glib0 libstdc++-4.8-dev python3-ply xulrunner-29
Use 'apt-get autoremove' to remove them.
Suggested packages:
  vim-doc vim-scripts
The following NEW packages will be installed:
  vim
0 upgraded, 1 newly installed, 0 to remove and 28 not upgraded.
Need to get 0 B/905 kB of archives.
After this operation, 2,088 kB of additional disk space will be used.
Selecting previously unselected package vim.
(Reading database ... 220338 files and directories currently installed.)
Preparing to unpack .../vim_2%3a7.4.335-1_amd64.deb ...
Unpacking vim (2:7.4.335-1) ...
Setting up vim (2:7.4.335-1) ...
update-alternatives: using /usr/bin/vim.basic to provide /usr/bin/vim (vim) in auto mode
update-alternatives: using /usr/bin/vim.basic to provide /usr/bin/vimdiff (vimdiff) in auto mode
update-alternatives: using /usr/bin/vim.basic to provide /usr/bin/rvim (rvim) in auto mode
update-alternatives: using /usr/bin/vim.basic to provide /usr/bin/rview (rview) in auto mode
update-alternatives: using /usr/bin/vim.basic to provide /usr/bin/vi (vi) in auto mode
update-alternatives: using /usr/bin/vim.basic to provide /usr/bin/view (view) in auto mode
update-alternatives: using /usr/bin/vim.basic to provide /usr/bin/ex (ex) in auto mode

This should be familiar to anyone that uses Debian/Ubuntu, it’s standard apt-get install output. Of course, this is a development system so I have some cruft, but we’ll ignore that ;).

If we run_chef again, we get the output we saw in the original example in this post:

1
[2014-07-21T09:50:06-06:00] DEBUG: package[vim] is already installed - nothing to do

ChefDK and Ruby

Recently, Chef released ChefDK, the “Chef Development Kit.” This is a self-contained package of everything required to run Chef, work with Chef cookbooks, and includes the best of breed community tools, test frameworks, and other utility programs that are commonly used when working with Chef in infrastructure as code. ChefDK version 0.1.0 was released last week. A new feature mentioned in the README.md is very important, in my opinion.

Using ChefDK as your primary development environment

What does that mean?

It means that if the only reason you have Ruby installed on your local system is to do Chef development or otherwise work with Chef, you no longer have to maintain a separate Ruby installation. That means you won’t need any of these:

  • rbenv
  • rvm
  • chruby (*note)
  • “system ruby” (e.g., OS X’s included /usr/bin/ruby, or the ruby package from your Linux distro)
  • poise ruby)

(*note: You can optionally use chruby with ChefDK if it’s part of your workflow and you have other Rubies installed.)

Do not misunderstand me: These are all extremely good solutions for getting and using Ruby on your system. They definitely have their place if you do other Ruby development, such as web applications. This is especially true if you have to work with multiple versions of Ruby. However, if you’re like me and mainly use Ruby for Chef, then ChefDK has you covered.

In this post, I will describe how I have set up my system with ChefDK, and use its embedded Ruby by default.

Getting Started

Download ChefDK from the downloads page. At the time of this blog post, the available builds are limited to OS X and Linux (Debian/Ubuntu or RHEL), but Chef is working on Windows packages.

For example, here’s what I did on my Ubuntu 14.04 system:

1
2
wget https://opscode-omnibus-packages.s3.amazonaws.com/ubuntu/13.10/x86_64/chefdk_0.1.0-1_amd64.deb
sudo dpkg -i /tmp/chefdk_0.1.0-1_amd64.deb

OS X users will be happy to know that the download is a .DMG, which includes a standard OS X .pkg (complete with developer signing). Simply install it like many other products on OS X.

For either Linux or OS X, in omnibus fashion, the post-installation creates several symbolic links in /usr/bin for tools that are included in ChefDK:

1
2
3
4
5
6
7
8
9
10
11
12
13
14
15
16
17
% ls -l /usr/bin | grep chefdk
lrwxrwxrwx 1 root root 21 Apr 30 22:13 berks -> /opt/chefdk/bin/berks
lrwxrwxrwx 1 root root 20 Apr 30 22:13 chef -> /opt/chefdk/bin/chef
lrwxrwxrwx 1 root root 26 Apr 30 22:13 chef-apply -> /opt/chefdk/bin/chef-apply
lrwxrwxrwx 1 root root 27 Apr 30 22:13 chef-client -> /opt/chefdk/bin/chef-client
lrwxrwxrwx 1 root root 26 Apr 30 22:13 chef-shell -> /opt/chefdk/bin/chef-shell
lrwxrwxrwx 1 root root 25 Apr 30 22:13 chef-solo -> /opt/chefdk/bin/chef-solo
lrwxrwxrwx 1 root root 25 Apr 30 22:13 chef-zero -> /opt/chefdk/bin/chef-zero
lrwxrwxrwx 1 root root 23 Apr 30 22:13 fauxhai -> /opt/chefdk/bin/fauxhai
lrwxrwxrwx 1 root root 26 Apr 30 22:13 foodcritic -> /opt/chefdk/bin/foodcritic
lrwxrwxrwx 1 root root 23 Apr 30 22:13 kitchen -> /opt/chefdk/bin/kitchen
lrwxrwxrwx 1 root root 21 Apr 30 22:13 knife -> /opt/chefdk/bin/knife
lrwxrwxrwx 1 root root 20 Apr 30 22:13 ohai -> /opt/chefdk/bin/ohai
lrwxrwxrwx 1 root root 23 Apr 30 22:13 rubocop -> /opt/chefdk/bin/rubocop
lrwxrwxrwx 1 root root 20 Apr 30 22:13 shef -> /opt/chefdk/bin/shef
lrwxrwxrwx 1 root root 22 Apr 30 22:13 strain -> /opt/chefdk/bin/strain
lrwxrwxrwx 1 root root 24 Apr 30 22:13 strainer -> /opt/chefdk/bin/strainer

These should cover the 80% use case of ChefDK: using the various Chef and Chef Community tools so users can follow their favorite workflow, without shaving the yak of managing a Ruby environment.

But, as I noted, and the thesis of this post, is that one could use this Ruby environment included in ChefDK as their own! So where is that?

ChefDK’s Ruby

Tucked away in every “omnibus” package is a directory of “embedded” software – the things that were required to meet the end goal. In the case of Chef or ChefDK, this is Ruby, openssl, zlib, libpng, and so on. This is a fully contained directory tree, complete with lib, share, and yes indeed, bin.

1
2
% ls /opt/chefdk/embedded/bin
(there's a bunch of commands here, trust me)

Of particular note are /opt/chefdk/embedded/bin/ruby and /opt/chefdk/embedded/bin/gem.

To use ChefDK’s Ruby as default, simply edit the $PATH.

1
export PATH="/opt/chefdk/embedded/bin:${HOME}/.chefdk/gem/ruby/2.1.0/bin:$PATH"

Add that, or its equivalent, to a login shell profile/dotrc file, and rejoice. Here’s what I have now:

1
2
3
4
5
6
7
8
9
10
11
12
13
14
15
16
17
18
19
20
21
22
23
24
25
26
27
28
29
30
31
32
33
34
35
36
37
38
39
40
41
42
$ which ruby
/opt/chefdk/embedded/bin/ruby
$ which gem
/opt/chefdk/embedded/bin/gem
$ ruby --version
ruby 2.1.1p76 (2014-02-24 revision 45161) [x86_64-linux]
$ gem --version
2.2.1
$ gem env
RubyGems Environment:
  - RUBYGEMS VERSION: 2.2.1
  - RUBY VERSION: 2.1.1 (2014-02-24 patchlevel 76) [x86_64-linux]
  - INSTALLATION DIRECTORY: /opt/chefdk/embedded/lib/ruby/gems/2.1.0
  - RUBY EXECUTABLE: /opt/chefdk/embedded/bin/ruby
  - EXECUTABLE DIRECTORY: /opt/chefdk/embedded/bin
  - SPEC CACHE DIRECTORY: /home/ubuntu/.gem/specs
  - RUBYGEMS PLATFORMS:
    - ruby
    - x86_64-linux
  - GEM PATHS:
     - /opt/chefdk/embedded/lib/ruby/gems/2.1.0
     - /home/ubuntu/.chefdk/gem/ruby/2.1.0
  - GEM CONFIGURATION:
     - :update_sources => true
     - :verbose => true
     - :backtrace => false
     - :bulk_threshold => 1000
     - "install" => "--user"
     - "update" => "--user"
  - REMOTE SOURCES:
     - https://rubygems.org/
  - SHELL PATH:
     - /opt/chefdk/embedded/bin
     - /home/ubuntu/.chefdk/gem/ruby/2.1.0/bin
     - /usr/local/sbin
     - /usr/local/bin
     - /usr/sbin
     - /usr/bin
     - /sbin
     - /bin
     - /usr/games
     - /usr/local/games

Note that this is the current stable release of Ruby, version 2.1.1 patchlevel 76, and the {almost} latest version of RubyGems, version 2.2.1. Also note the Gem paths – the first is the embedded gems path, which is where gems installed by root with the chef gem command will go. The other is in my home directory – ChefDK is set up so that gems can be installed as a non-root user within the ~/.chefdk/gems directory.

Installing Gems

Let’s see this in action. Install a gem using the gem command.

1
2
3
4
5
6
7
$ gem install knife-solve
Fetching: knife-solve-1.0.1.gem (100%)
Successfully installed knife-solve-1.0.1
Parsing documentation for knife-solve-1.0.1
Installing ri documentation for knife-solve-1.0.1
Done installing documentation for knife-solve after 0 seconds
1 gem installed

And as I said, this will be installed in the home directory:

1
2
3
4
5
6
7
$ gem content knife-solve
/home/ubuntu/.chefdk/gem/ruby/2.1.0/gems/knife-solve-1.0.1/LICENSE
/home/ubuntu/.chefdk/gem/ruby/2.1.0/gems/knife-solve-1.0.1/README.md
/home/ubuntu/.chefdk/gem/ruby/2.1.0/gems/knife-solve-1.0.1/Rakefile
/home/ubuntu/.chefdk/gem/ruby/2.1.0/gems/knife-solve-1.0.1/lib/chef/knife/solve.rb
/home/ubuntu/.chefdk/gem/ruby/2.1.0/gems/knife-solve-1.0.1/lib/knife-solve.rb
/home/ubuntu/.chefdk/gem/ruby/2.1.0/gems/knife-solve-1.0.1/lib/knife-solve/version.rb

Using Bundler

ChefDK also includes bundler. As a “non-Chef, Ruby use case”, I installed octopress for this blog.

1
2
3
4
5
6
7
8
9
10
11
12
13
14
15
16
17
18
19
20
21
22
23
24
25
26
27
28
29
30
31
32
33
34
35
36
37
38
39
40
41
42
43
44
45
46
47
48
49
50
51
52
53
54
55
% bundle install --path vendor --binstubs
Fetching gem metadata from https://rubygems.org/.......
Fetching additional metadata from https://rubygems.org/..
Installing rake (0.9.6)
Installing RedCloth (4.2.9)
Installing chunky_png (1.2.9)
Installing fast-stemmer (1.0.2)
Installing classifier (1.3.3)
Installing fssm (0.2.10)
Installing sass (3.2.12)
Installing compass (0.12.2)
Installing directory_watcher (1.4.1)
Installing haml (3.1.8)
Installing kramdown (0.14.2)
Installing liquid (2.3.0)
Installing maruku (0.7.0)
Installing posix-spawn (0.3.6)
Installing yajl-ruby (1.1.0)
Installing pygments.rb (0.3.7)
Installing jekyll (0.12.1)
Installing rack (1.5.2)
Installing rack-protection (1.5.0)
Installing rb-fsevent (0.9.3)
Installing rdiscount (2.0.7.3)
Installing rubypants (0.2.0)
Installing sass-globbing (1.0.0)
Installing tilt (1.4.1)
Installing sinatra (1.4.3)
Installing stringex (1.4.0)
Using bundler (1.5.2)
Updating files in vendor/cache
  * classifier-1.3.3.gem
  * fssm-0.2.10.gem
  * sass-3.2.12.gem
  * compass-0.12.2.gem
  * directory_watcher-1.4.1.gem
  * haml-3.1.8.gem
  * kramdown-0.14.2.gem
  * liquid-2.3.0.gem
  * maruku-0.7.0.gem
  * posix-spawn-0.3.6.gem
  * yajl-ruby-1.1.0.gem
  * pygments.rb-0.3.7.gem
  * jekyll-0.12.1.gem
  * rack-1.5.2.gem
  * rack-protection-1.5.0.gem
  * rb-fsevent-0.9.3.gem
  * rdiscount-2.0.7.3.gem
  * rubypants-0.2.0.gem
  * sass-globbing-1.0.0.gem
  * tilt-1.4.1.gem
  * sinatra-1.4.3.gem
  * stringex-1.4.0.gem
Your bundle is complete!
It was installed into ./vendor

Then I can use for example the rake task to preview things while writing this post.

1
2
3
4
5
6
7
$ ./bin/rake preview
Starting to watch source with Jekyll and Compass. Starting Rack on port 4000
directory source/stylesheets/
   create source/stylesheets/screen.css
[2014-05-07 21:46:35] INFO  WEBrick 1.3.1
[2014-05-07 21:46:35] INFO  ruby 2.1.1 (2014-02-24) [x86_64-linux]
[2014-05-07 21:46:35] INFO  WEBrick::HTTPServer#start: pid=10815 port=4000

Conclusion

I’ve used Chef before it was even released. As the project has evolved, and as the Ruby community around it has established new best practices installing and maintaining Ruby development environments, I’ve followed along. I’ve used all the version managers listed above. I’ve spent untold hours getting the right set of gems installed just to have to upgrade everything again and debug my workstation. I’ve written blog posts, wiki pages, and helped countless users do this on their own systems.

Now, we have an all-in-one environment that provides a great solution. Give ChefDK a whirl on your workstation – I think you’ll like it!